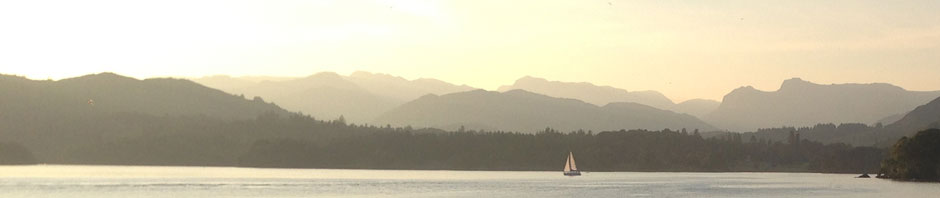
I’ve added a new header photograph of Red Screes taken from the path along the side of Wansfell leading to Stock Ghyll falls. Note the hint of blue sky – but it was August I suppose.

Posted on by danmassey99 | Leave a comment

Using MTM ITK for Apache

I needed to secure websites on a FreeBSD server to stop ‘cross site contamination’, i.e. stopping virtualhost #1 modifying/reading data within virtualhost #2. In FreeBSD the solution (or at least one solution) appears to be apache22-itk-mpm.

Step 1. Install the port (I just accepted all the defaults)

# cd /usr/ports/www/apache22-itk-mpm
# make install

Step 2. restart Apache

# service apache22 restart

Step 3. Modify your VirtualHost stanzas adding:

<IfModule mpm_itk_module>
   AssignUserId <user> <group>
</IfModule>

So when you re-start Apache, the apache processes all appear to be owned by root to allow the setUID process to work. If you do not specify an ‘AssignedUserID’ then the apache default is used.

The last think to do is to rest the permissions of the user site in question. In order to stop other sites (including unassigned sites) reading the data I’ve use a very restrictive set of permissions. When you have moved to the web root for the VirtualHost:

find ./ -type d -exec chmod 700 {} \;
find ./ -type f -exec chmod 600 {} \;

I have some .cgi pages in some sites so once i had hosed all of the file permission i needed to make cgi scripts executable again but only by the owner:

find ./ -name \*cgi -exec chmod 0700 {} \;

I have read that there are some issues with cgi-bin directories which are really links, but if i run up against any issues, I’ll update the post.

Posted in Apache, FreeBSD Administration | Tagged , , | Leave a comment

So, the comforting grey blanket of cloud returned to Ambleside today making Loughrigg and the Coniston hills disappear the rain. All that sunshine is not good for you!

Posted on by danmassey99 | Leave a comment

Using SNMP to monitor disk space on CentOS

The task here is to set up a Nagios test to monitor disk space on a CentOS box. Ive had the firewall protecting the remote CentOS box set up to allow UDP port 161 through so we need to set up SNMP on the box.

Start with an update

# yum update

Install the SNMP software

yum install net-snmp-utils
yum install net-snmp

Now set up the config file

cd /etc/snmp
mv snmpd.conf old_snmpd.conf

echo 'syslocation "My Location"' >> snmpd.conf
echo 'syscontact  "Dan Massey"' >> snmpd.conf
echo 'sysservices 76' >> snmpd.conf
echo '' >> snmpd.conf
echo 'rocommunity public localhost' >> snmpd.conf
echo 'rocommunity  mycommstring  ip address' >> snmpd.conf
echo '' >> snmpd.conf
echo 'disk /' >> snmpd.conf

Make snmpd start up when we reboot

chkconfig snmpd on

OK, so now we need to check its working locally:

# snmpwalk -v 2c -c public localhost system
SNMPv2-MIB::sysDescr.0 = STRING: Linux my.domain.com 2.6.32-358.14.1.el6.i686 #1 SMP Tue Jul 16 21:12:30 UTC 2013 i686
SNMPv2-MIB::sysObjectID.0 = OID: NET-SNMP-MIB::netSnmpAgentOIDs.10
DISMAN-EVENT-MIB::sysUpTimeInstance = Timeticks: (458) 0:00:04.58
SNMPv2-MIB::sysContact.0 = STRING: "Dan Massey"
SNMPv2-MIB::sysName.0 = STRING: my.domain.com
SNMPv2-MIB::sysLocation.0 = STRING: "My Location"
SNMPv2-MIB::sysServices.0 = INTEGER: 76
SNMPv2-MIB::sysORLastChange.0 = Timeticks: (2) 0:00:00.02
SNMPv2-MIB::sysORID.1 = OID: SNMP-MPD-MIB::snmpMPDMIBObjects.3.1.1
SNMPv2-MIB::sysORID.2 = OID: SNMP-USER-BASED-SM-MIB::usmMIBCompliance
SNMPv2-MIB::sysORID.3 = OID: SNMP-FRAMEWORK-MIB::snmpFrameworkMIBCompliance
SNMPv2-MIB::sysORID.4 = OID: SNMPv2-MIB::snmpMIB
SNMPv2-MIB::sysORID.5 = OID: TCP-MIB::tcpMIB
SNMPv2-MIB::sysORID.6 = OID: IP-MIB::ip
SNMPv2-MIB::sysORID.7 = OID: UDP-MIB::udpMIB
SNMPv2-MIB::sysORID.8 = OID: SNMP-VIEW-BASED-ACM-MIB::vacmBasicGroup
SNMPv2-MIB::sysORDescr.1 = STRING: The MIB for Message Processing and Dispatching.
SNMPv2-MIB::sysORDescr.2 = STRING: The MIB for Message Processing and Dispatching.
SNMPv2-MIB::sysORDescr.3 = STRING: The SNMP Management Architecture MIB.
SNMPv2-MIB::sysORDescr.4 = STRING: The MIB module for SNMPv2 entities
SNMPv2-MIB::sysORDescr.5 = STRING: The MIB module for managing TCP implementations
SNMPv2-MIB::sysORDescr.6 = STRING: The MIB module for managing IP and ICMP implementations
SNMPv2-MIB::sysORDescr.7 = STRING: The MIB module for managing UDP implementations
SNMPv2-MIB::sysORDescr.8 = STRING: View-based Access Control Model for SNMP.
SNMPv2-MIB::sysORUpTime.1 = Timeticks: (2) 0:00:00.02
SNMPv2-MIB::sysORUpTime.2 = Timeticks: (2) 0:00:00.02
SNMPv2-MIB::sysORUpTime.3 = Timeticks: (2) 0:00:00.02
SNMPv2-MIB::sysORUpTime.4 = Timeticks: (2) 0:00:00.02
SNMPv2-MIB::sysORUpTime.5 = Timeticks: (2) 0:00:00.02
SNMPv2-MIB::sysORUpTime.6 = Timeticks: (2) 0:00:00.02
SNMPv2-MIB::sysORUpTime.7 = Timeticks: (2) 0:00:00.02
SNMPv2-MIB::sysORUpTime.8 = Timeticks: (2) 0:00:00.02

So that worked fine, let test the disk – i’m only monitoring the ‘/’ partition here so the test and the output looks like:

# /usr/bin/snmpwalk  -v 2c -c public localhost .1.3.6.1.4.1.2021.9
UCD-SNMP-MIB::dskIndex.1 = INTEGER: 1
UCD-SNMP-MIB::dskPath.1 = STRING: /
UCD-SNMP-MIB::dskDevice.1 = STRING: /dev/mapper/vg_cube-LogVol01
UCD-SNMP-MIB::dskMinimum.1 = INTEGER: 100000
UCD-SNMP-MIB::dskMinPercent.1 = INTEGER: -1
UCD-SNMP-MIB::dskTotal.1 = INTEGER: 1918094464
UCD-SNMP-MIB::dskAvail.1 = INTEGER: 1576078080
UCD-SNMP-MIB::dskUsed.1 = INTEGER: 244582816
UCD-SNMP-MIB::dskPercent.1 = INTEGER: 13
UCD-SNMP-MIB::dskPercentNode.1 = INTEGER: 3
UCD-SNMP-MIB::dskTotalLow.1 = Gauge32: 1918094464
UCD-SNMP-MIB::dskTotalHigh.1 = Gauge32: 0
UCD-SNMP-MIB::dskAvailLow.1 = Gauge32: 1576078080
UCD-SNMP-MIB::dskAvailHigh.1 = Gauge32: 0
UCD-SNMP-MIB::dskUsedLow.1 = Gauge32: 244582816
UCD-SNMP-MIB::dskUsedHigh.1 = Gauge32: 0
UCD-SNMP-MIB::dskErrorFlag.1 = INTEGER: noError(0)
UCD-SNMP-MIB::dskErrorMsg.1 = STRING: 

Posted in CentOS | Tagged , | Leave a comment

Running a Jabber server on Ubuntu

After the disintegration of any kind of Messenger service from MSN, and my reluctance to use Skype, I’m looking into a home grown, private messenger service. The service I’m after needs to be ‘invite only’ – i.e. our staff and work on Mac, Linux and PC (in order of preference!). I’ve found a couple solutions namely Jabberd2 and Openfire. The decision to install the solution on Ubuntu was mainly part of my ongoing ‘conversion’ from exclusively FreeBSD to Debian Based and Redhat based Linux. After reading through the install instructions, the Openfire solution seemed the quickest and Dirtiest to get off the ground.

I’m starting from a vanilla Ubuntu install (Basic Server), the first job is to update the system:

sudo apt-get update
sudo apt-get upgrade

Openfire runs on Java, so we need to install the OpenJDK first:

sudo apt-get install openjdk-7-jre

Now download the tarball from the Openfire web site, this actual filename will change over time, but today it was:

wget http://www.igniterealtime.org/downloadServlet?filename=openfire/openfire_3_8_2.tar.gz

We just need to rename it to something a bit less clunky and then unzip it.

mv downloadServlet?filename=openfire%2Fopenfire_3_8_2.tar.gz openfire_3_8_2.tar.gz
tar -xvzf openfire_3_8_2.tar.gz

OK, now we can move the whole newly formed directory structure to the /opt directory

mv openfire /opt/

Lastly, its nice to use the service commands for starting up, so add a link and then let’s start the service:

ln -s /opt/openfire/bin/openfire /etc/init.d/
service openfire start

Now you can browse to http://yourserver:9090 and continue with the setup wizard. Most of it is pretty self explanatory now, but if you are going for the ‘zero-to-hero’ in the fewest mouse clicks then go for the embedded database option and fill in a few users. I am using the PSI client as it seems to work across platforms, however the Ubuntu Desktop client was very fussy about the self signed vert we get out of the box, but once that is sorted out, it ‘just works’. This project is a candidate for our pre-configured 30:30 servers, but the installation method may be changed for that

Here’s the link to Openfire: http://www.igniterealtime.org/projects/openfire/

Posted in Ubuntu | Tagged , , | Leave a comment

PPP Multilinking over ADSL

Well the broadband where I live is shocking. Although its now managed to creep up to a staggering 6mbps, it still well below what I’d hope for in todays world. On the bright side its quiet and we overlook countryside, so I guess you can’t have it all the time. As it happens I’m not the only one with ADSL speed issues so I thought I’d do some work on PPP multi-linking the 2 lines I have installed at home into one huge virtual bundle. I’m using a Cisco 1841 with 2 x ADSL cards (HWIC). On the LNS its fine, I just add:

ppp multilink

to the Virtual Template. Now the configuration on the CPE

interface ATM0/0/0
bandwidth 1000
no ip address
no atm ilmi-keepalive
dsl operating-mode auto
pvc 0/38
  encapsulation aal5mux ppp dialer
  dialer pool-member 1
!
!
interface ATM0/1/0
bandwidth 1000
no ip address
no atm ilmi-keepalive
dsl operating-mode auto
pvc 0/38
  encapsulation aal5mux ppp dialer
  dialer pool-member 1
!
!
interface Dialer0
bandwidth 2000
ip address negotiated
ip nat outside
ip virtual-reassembly
encapsulation ppp
dialer pool 1
dialer idle-timeout 0
dialer persistent
ppp authentication chap callin
ppp chap hostname XXXXXX
ppp chap password 0 XXXXXXX
ppp multilink

When you connect it up, the sure enough there is a bundle formed and the speed when tested now gives me about 12mbps download and 2 mpbs upload – nice!

As a side note, I added the bandwidth statements to the ATM and dialer interfaces as you can see above. i also added a line to my radius file to set the bandwidth to any arbitrary number, just so long as when the bundle hooks up, it treats the lines as equal. If you don’t ‘stabilise’ it like this you will see a ‘weight’ when executing a

show ppp multilink

which gives some good output (from the CPE):

Virtual-Access3
  Bundle name: DSL1
  Remote Username: DSL1
  Remote Endpoint Discriminator: [1] DSL1
  Local Username: XXXXXX
  Local Endpoint Discriminator: [1] XXXXX
  Bundle up for 00:04:14, total bandwidth 2000, load 21/255
  Receive buffer limit 24384 bytes, frag timeout 1000 ms
  Dialer interface is Dialer0
    0/0 fragments/bytes in reassembly list
    447 lost fragments, 28586 reordered
    505/366985 discarded fragments/bytes, 0 lost received
    0xEDCC received sequence, 0x8153 sent sequence
  Member links: 2 (max not set, min not set)
    Vi2, since 00:04:14
    PPPoATM link, ATM PVC 0/38 on ATM0/0/0
    Packets in ATM PVC Holdq: 0, Particles in ATM PVC Tx Ring: 0
    Vi4, since 00:04:14
    PPPoATM link, ATM PVC 0/38 on ATM0/1/0
    Packets in ATM PVC Holdq: 0, Particles in ATM PVC Tx Ring: 0
No inactive multilink interfaces
Posted in Cisco | Tagged , | Leave a comment

New header photograph

Summer has kind of arrived so I’ve ditched the old picture of a snow capped Coniston Old Man, Weatherlam and Swirl How. The new picture was taken last weekend of the Langdale Pikes from Elterwater, Great Langdale.

Posted in Uncategorized | Leave a comment

RT – starting from a ticket number larger than 1

Ok, so not a request you would get every day, but when setting up our new RT (Request Tracker) server, we had a requirement to start at ticket number 200,000. This requirement was to ensure the new RT server’s tickets did not overlap with the old server. We have some great new features with the version 4 and we have also installed the SLA add on – all very exciting! Anyway, how is this change made?

The first thing you need to know is there is no convenient, easy to use button to click or setting to make in the config file. This needs to be done on the database direct, in my case this is a MySQL database, but it could be any of the supported database types. From the command line, log into the MySQL console and navigate to the rt4 database:

# mysql -u root -p
Enter password: 
Welcome to the MySQL monitor.  Commands end with ; or \g.
Your MySQL connection id is 108
Server version: 5.5.30 Source distribution

Copyright (c) 2000, 2013, Oracle and/or its affiliates. All rights reserved.

Oracle is a registered trademark of Oracle Corporation and/or its
affiliates. Other names may be trademarks of their respective
owners.

Type 'help;' or '\h' for help. Type '\c' to clear the current input statement.

mysql> use rt4
Reading table information for completion of table and column names
You can turn off this feature to get a quicker startup with -A

Database changed
mysql> show tables;
+-------------------------+
| Tables_in_rt4           |
+-------------------------+
| ACL                     |
| Articles                |
| Attachments             |
| Attributes              |
| CachedGroupMembers      |
| Classes                 |
| CustomFieldValues       |
| CustomFields            |
| GroupMembers            |
| Groups                  |
| Links                   |
| ObjectClasses           |
| ObjectCustomFieldValues |
| ObjectCustomFields      |
| ObjectTopics            |
| Principals              |
| Queues                  |
| ScripActions            |
| ScripConditions         |
| Scrips                  |
| Templates               |
| Tickets                 |
| Topics                  |
| Transactions            |
| Users                   |
| sessions                |
+-------------------------+
26 rows in set (0.00 sec)

mysql> 

So we can see the tables and the one that interests us is the Tickets table. We need to alter the auto increment setting to start at 200000 from here:

mysql> ALTER TABLE Tickets AUTO_INCREMENT = 200000;

Job done!
 

Posted in FreeBSD Administration, MySQL | Tagged , | Leave a comment

Updating FreeBSD – The modern way!

The time has finally come for me to update my update method. For years I have been a ‘dyed-in-the-wool’ cvsup guy, but the last server I installed (FreeBSD 9.1) started bleating about the ports tree not being updated any more, and to be honest I should have taken more notice of my emails! The full story can be found ***here***

So whats the ‘new way’?

FreeBSD has a great utility called freebsd-update which will take care of security fixes as well as minor and major upgrades to the kernel. The freebsd-update does not need to be installed or, even configured unless you have specific requirements. You can control behaviour with the configuration file located in /etc/freebsd-update.conf. So lets just do the first update from the command line:

# freebsd-update fetch
# freebsd-update install

I want to automate this with cron so first I added my email address to the config file. The I added the special 'cron' feature as such:

@daily                                  root    freebsd-update cron

that takes care of the kernel…

What about the Ports?

Portsnap takes care of the ports collection without much effort at all. As always there is has a configuration file, but unless you have some specific issues it can probably left alone. For reference it lives here: /etc/portsnap.conf. To run the program for the first time:

# portsnap fetch
# portsnap extract

thereafter

# portsnap fetch update

Thats pretty much it, you can cron the job if you wish, however I tend to do it on demand.

Posted in FreeBSD Administration | Tagged , , | Leave a comment

Fun (?!) with Cisco OSPF part 1

There are several factors involved in successfully forming an OSPF neighbourship, these are:

  1. Must pass the authentication process
  2. Must be in the same subnet with a matching mask
  3. Must be in the same OSPF area
  4. Stub flag must match
  5. Unique router-id required
  6. Dead and hello timers must match

This post really just refers to item 3 – the OSPF area. In the past I have come across routers set in area 0.0.0.0 while being neighbours of routers in area 0. This always struck me as weird but I had assumed it was an old IOS thing and pushed it to the back of my mind! It seems however that the area ID can be entered in either decimal or dotted quad notation, more interestingly they are interoperable! Here is the configuration in standard format:

router ospf 1
 log-adjacency-changes
 network 10.1.0.4 0.0.0.0 area 456

All pretty standard, but the neighbour is configured thus:

router ospf 1
 log-adjacency-changes
 network 10.1.0.5 0.0.0.0 area 0.0.1.200

Interesting huh? How does 0.0.1.200 become 456? Well, the dotted quad format should be treated as 32 bit single binary number so in full binary it would be:

0000 0000 0000 0000 0000 0001 1100 1000

When you take into account that the router shows this when we use the question mark after the ‘area’ part of the command:

R5(config-router)#network 1.1.1.1 0.0.0.0 area ?
  <0-4294967295>  OSPF area ID as a decimal value
  A.B.C.D         OSPF area ID in IP address format

And as you would predict, the binary number 1111 1111 1111 1111 1111 1111 1111 1111 is equal to 4294967295 or, should you want to enter the area in dotted quad format, it is of course 255.255.255.255

It’s not possible to mix up the formats on the same router, it seems that once an area has been defined in dotted quad format, there it must stay, see this example:

R4(config)#router ospf 1
R4(config-router)#network 4.4.4.4 0.0.0.0 area 255.255.255.255 
R4(config-router)#area 4294967295 stub
R4(config-router)#exit
R4#sh run | s ospf
router ospf 1
 log-adjacency-changes
 area 255.255.255.255 stub
 network 4.4.4.4 0.0.0.0 area 255.255.255.255

But I suppose that would have been VERY confusing!

Posted in Cisco | Tagged , , | Leave a comment